Wednesday, March 09, 2011

JSF 2, Spring 3, JPA (Hibernate 3), PostgreSQL, c3p0 - everything together (part 1 of 2)

Note: below description uses Eclipse Indigo, Tomcat 7.0.28, MyFaces 2.1.7, Spring Framework 3.1.1, Spring Security 3.1.0, Hibernate 3.6.10 (Final), PostgreSQL 9.1.

Requirements:
  • a working example of JSF 2.0 application with Spring Framework and Spring Security integrated (can be found here)
  • installed PostgreSQL database (simple installation variant described here)
You will learn:
  • how to use database for loading and storing the data in the sample JSF 2.0  application
  • how to access the database from the application using JPA (Hibernate) and Spring
  • how to optimize database access by using connection pool (c3p0)
It is a high time to create a real working example with a database. Sample application used in previous posts use no database. We had Spring's managed service named bikeDataProvider acting as a database - all bikes data were created in that service during startup, all bikes data were retrieved from that service, even new bike data were stored internally in the service:
package com.jsfsample.services.impl;
...
@Service("bikeDataProvider")
public class BikeDataProviderImpl implements BikeDataProvider {

 private List<Bike> bikes;

 @PostConstruct
 private void prepareData(){
  bikes = new ArrayList<Bike>();
  
  // MTB
  Bike mtb1 = new Bike();
  mtb1.setId(1);
  mtb1.setName("Kellys Mobster");
  mtb1.setDescription("Kellys Mobster, lorem ipsut...");
  mtb1.setPrice(6500);
  mtb1.setCategory(1);
  
  // ... rest of mock bikes created here
 }
 
 public List<Bike> getBikesByCategory(Integer categoryId, boolean onlyWithDiscount) {
  // returns bikes by given category
 }
 
 public Bike getBikeById(Integer id){
  // returns certain bike for its details
 }

 @Override
 public void add(Bike newBike) {
  // add new bike 
  bikes.add(newBike);
 }
}
The same method of creating mock data was used in Spring's managed service named userDetailsService - users and their authorities were created directly inside the service:
package com.jsfsample.application.impl;
...
@Service("userDetailsService")
public class UserDetailsServiceImpl implements UserDetailsService {

 private HashMap<String, org.springframework.security.core.userdetails.User> users = new HashMap<String, org.springframework.security.core.userdetails.User>();
 
 @Override
 public UserDetails loadUserByUsername(String username) {
  // returns user
 }

 @PostConstruct
 public void init() {
  
  // mocked roles  
  Collection<GrantedAuthority> adminAuthorities = new ArrayList<GrantedAuthority>();
  adminAuthorities.add(new GrantedAuthorityImpl("ROLE_ADMIN"));
  
  Collection<GrantedAuthority> userAuthorities = new ArrayList<GrantedAuthority>();
  userAuthorities.add(new GrantedAuthorityImpl("ROLE_REGISTERED"));
  
  boolean enabled = true;
  boolean accountNonExpired = true;
  boolean credentialsNonExpired = true;
  boolean accountNonLocked = true;
  
  // mocked users with roles
  users.put("admin", new org.springframework.security.core.userdetails.User("admin", "admin", enabled, accountNonExpired,
    credentialsNonExpired, accountNonLocked, adminAuthorities));
  
  users.put("user", new org.springframework.security.core.userdetails.User("user", "user", enabled, accountNonExpired,
    credentialsNonExpired, accountNonLocked, userAuthorities));
 }
}
In both cases all data are created in the method annotated with @PostConstruct. That annotation means, that method will be invoked first after creating an instance of a class (in this case Spring creates instances of those service classes).

Our objective is to remove that mocked data created explicite in the services classes and replace them with data coming from real database.

Step 1: we need database structure:
CREATE TABLE "role" (
 role_id SERIAL NOT NULL,
 name VARCHAR(32),  
 CONSTRAINT role_pk PRIMARY KEY (role_id)
);

CREATE TABLE "account" (
 account_id SERIAL NOT NULL,
 role_id INTEGER NOT NULL,
 login VARCHAR(32),
 password VARCHAR(32),
 CONSTRAINT account_pk PRIMARY KEY (account_id),
 CONSTRAINT role_id_fk FOREIGN KEY (role_id) REFERENCES role(role_id)
);

CREATE TABLE "bike_category" (
 bike_category_id SERIAL NOT NULL,
 name VARCHAR(32),  
 CONSTRAINT bike_category_pk PRIMARY KEY (bike_category_id)
);

CREATE TABLE "bike" (
 bike_id SERIAL NOT NULL,
 bike_category_id INTEGER NOT NULL,
 name VARCHAR(32),
 description TEXT,
 price numeric(10,2),
 discount_price numeric(10,2),    
 CONSTRAINT bike_pk PRIMARY KEY (bike_id),
 CONSTRAINT bike_category_fk FOREIGN KEY (bike_category_id) REFERENCES bike_category(bike_category_id)
);
This is very simple database with two many-to-one relations: many users belongs to (have) one role and many bikes belongs to (have) one category. Of course in real world user would have many roles, so we would use many-to-many relation, but I decided to use many-to-one to simplify it.
Tables account and role will be used by Spring Security - they store users and their authorities (roles). Tables bike and bike_category are the "heart" of bike store.

Step 2: when structure is ready, it is time to insert some sample data:
INSERT INTO role (name) values ('ROLE_ADMIN'); -- id 1
INSERT INTO role (name) values ('ROLE_REGISTERED'); -- id 2

INSERT INTO account (role_id, login, password) values (1, 'admin', 'admin'); -- ROLE_ADMIN
INSERT INTO account (role_id, login, password) values (2, 'user', 'user'); -- ROLE_REGISTERED

INSERT INTO bike_category (name) values ('Mountain'); -- id 1
INSERT INTO bike_category (name) values ('Trekking'); -- id 2
INSERT INTO bike_category (name) values ('Cross'); -- id 3

INSERT INTO bike (bike_category_id, name, description, price, discount_price) values (1, 'Kellys Mobster', 'Kellys Mobster, lorem ipsut...', 6500, null); -- Mountain
INSERT INTO bike (bike_category_id, name, description, price, discount_price) values (1, 'Scott Scale', 'Scott Scale, lorem ipsut...', 18900, null); -- Mountain
INSERT INTO bike (bike_category_id, name, description, price, discount_price) values (1, 'Author Magnum', 'Author Magnum, lorem ipsut...', 17200, 15500); -- Mountain

INSERT INTO bike (bike_category_id, name, description, price, discount_price) values (2, 'Giant Accend', 'Giant Accend, lorem ipsut...', 5000, 4600); -- Trekking
INSERT INTO bike (bike_category_id, name, description, price, discount_price) values (2, 'Merida Freeway', 'Merida Freeway, lorem ipsut...', 2400, 2100); -- Trekking
INSERT INTO bike (bike_category_id, name, description, price, discount_price) values (2, 'Mbike Massive', 'Mbike Massive, lorem ipsut...', 1900, null); -- Trekking

INSERT INTO bike (bike_category_id, name, description, price, discount_price) values (3, 'Giant Roam XR 1', 'Giant Roam XR 1, lorem ipsut...', 3900, null); -- Cross
INSERT INTO bike (bike_category_id, name, description, price, discount_price) values (3, 'Cannondale Quick Cx', 'Cannondale Quick Cx, lorem ipsut...', 4999, null); -- Cross
INSERT INTO bike (bike_category_id, name, description, price, discount_price) values (3, 'Cube Cross', 'Cube Cross, lorem ipsut...', 4500, 4200); -- Cross

Step 3: adding required libraries into project.


Comparing those libraries with libraries from clean JSF 2.0 project (look here) or libraries from JSF 2.0 project with Spring (look here) we have extra libraries here: Hibernate libraries marked green, Spring JPA libraries marked red and some third party libraries marked blue. Those blue libraries are:
  • c3p0 libraries for connection pool
  • log4j library and bridge library from sl4j to log4j - Hibernate by default uses sl4j, but we would like to use log4j
  • JDBC driver for PostgreSQL
Step 4: configuration files - will be continued in next post.

-------------------------------------------
Download source files:
The complete working example of mentioned application which will contain all described issues, will be available in the last (second) article of this serie.

Friday, January 28, 2011

JSF 2 with Spring 3 - protection with Spring Security (part 2 of 2)

Note: below description uses Eclipse Indigo, Tomcat 7.0.28, MyFaces 2.1.7, Spring Framework 3.1, Spring Security 3.1.0.


Requirements:
  • a working example of JSF 2.0 application with Spring Framework integrated (can be found here)
You will learn:
  • how to use Spring Security Framework in order to protect web application
From the previous post we know what Spring Framework is, and what advantages it gives us when used in web application. Business logic managed by Spring is not the only one advantage coming from Spring - we can use Spring's embedded mechanisms to secure our web application. This post will show the basic usage of Spring Security for securing our sample JSF 2.0 webapp. 
What parts of our application will be protected? Consider those scenarios:
1. Only registered user (or page administrator) can see details of a selected bike.
2. Only page administrator can add a new bike to the shop offer.

We need two user roles which will determine the privilleges which user has: registered users role and admin users role. Moreover, for the scenario 2, we have to add a new function: adding new bike. For this function we will create a page addBike.xhtml and a JSF managed bean for that page, named addBike.java.

addBike.xhtml source code is shown below:
<?xml version='1.0' encoding='UTF-8' ?>
<!DOCTYPE html PUBLIC "-//W3C//DTD XHTML 1.0 Transitional//EN" "http://www.w3.org/TR/xhtml1/DTD/xhtml1-transitional.dtd">
<html xmlns="http://www.w3.org/1999/xhtml"
      xmlns:ui="http://java.sun.com/jsf/facelets"
      xmlns:h="http://java.sun.com/jsf/html"
      xmlns:f="http://java.sun.com/jsf/core">
  <ui:composition template="../shopTemplate.xhtml">
       
        <ui:define name="content">
        <h:form>
         <h:outputText value="#{msg['bikes.list.name']}: "/><h:inputText value="#{addBike.name}" /><br/>
         <h:outputText value="#{msg['bikes.list.price']}: "/><h:inputText value="#{addBike.price}" /><br/>
         <h:outputText value="#{msg['bikes.list.discountprice']}: "/><h:inputText value="#{addBike.discountPrice}" /><br/>         
         <h:outputText value="#{msg['bikes.list.description']}: "/><h:inputText value="#{addBike.description}" /><br/>
         <h:commandButton action="#{addBike.addNewBike}" value="#{msg['bikes.add.button']}" />
        </h:form>
        </ui:define>

  </ui:composition>
</html>
Nothing special - standard form for entering the data.
addBike.java source code is also simple:
package com.jsfsample.managedbeans;
...
@ManagedBean(name="addBike")
@SessionScoped
public class AddBike implements Serializable {

 private static final long serialVersionUID = -2155913853431899821L;
 
 
 @ManagedProperty("#{bikeDataProvider}")
 private BikeDataProvider bikeDataProvider; // injected Spring defined service for bikes
 
 private String name;
 private String description;
 private String price;
 private String discountPrice;
 private Integer categoryId;
 
 public String addNewBike(){

  Bike newBike = new Bike();
  newBike.setName(getName());
  newBike.setDescription(getDescription());
  newBike.setPrice(Integer.parseInt(getPrice()));
  newBike.setDiscountPrice(Integer.parseInt(getDiscountPrice()));
  newBike.setCategory(categoryId);
  
  // save new bike and return to the shop
  bikeDataProvider.add(newBike);  
  return "/bikesShop.xhtml";
 }; 
 ...
}
Please note that we use here BikeDataProvider.java class, which is Spring managed service, the same we used for loading bikes list and loading a certain bike details in previous post.

Now it is time for protected parts of application. I will show two ways of protecting webapp: protecting resources (like access to certain page) and protecting business logic methods execution. Scenario 1 will be an example of protecting business logic and scenario 2 will be an example of protecting resources.
When user tries to access the protected area (resource or invoke protected method), application will check user roles and based on them will decide if let the user go further or force him to log in. Log in - that's right - a login page will be displayed where user will enter his credentials. Based on them Spring Security will decide what roles user has and depends on assigned roles further action will be continued or not. Let's modify our application to use Spring Security:

Step 1. Modify configuration files:
applicationContext.xml source:
...
 <!-- 
 resource security  
 -->
 <sec:http auto-config="true" access-denied-page="/faces/accessDenied.xhtml">
  <sec:form-login login-page="/faces/login.xhtml" />
  <sec:intercept-url pattern="/faces/admin/**" access="ROLE_ADMIN" />     
 </sec:http>
 <!-- 
 business logic (method) security 
 -->
 <sec:global-method-security
  secured-annotations="enabled" jsr250-annotations="enabled" >  
 </sec:global-method-security>
 <!-- 
 manager responsible for loading user account with assigned roles 
 -->
 <sec:authentication-manager alias="authenticationManager">
  <sec:authentication-provider
   user-service-ref="userDetailsService" />
 </sec:authentication-manager>
 ...
Access-denied-page is invoked when user is authenticated but is not authorized to access protected resources. When user is not authenticated, he is moved into form-login instead of access-denied-page.
web.xml source:
...
 <filter>
  <filter-name>springSecurityFilterChain</filter-name>
  <filter-class>org.springframework.web.filter.DelegatingFilterProxy</filter-class>
 </filter>
 <filter-mapping>
  <filter-name>springSecurityFilterChain</filter-name>
  <url-pattern>/*</url-pattern>
 </filter-mapping>
 ...
Step 2. Additional pages: login.xhtml and accessDenied.xhtml.
accessDenied.xhtml is simple page displaying only a message saying that the user is authenticated but still is not authorized to go further.
login.xhtml is a simple page with login form where user enters his credentials (login and password). The more interesting part is corresponding managed bean LoginBean.java which uses a Spring service for authenticating users:
package com.jsfsample.managedbeans;
...
@ManagedBean(name = "loginBean")
@SessionScoped
public class LoginBean implements Serializable {
 private static final long serialVersionUID = 1L;

 private String login;
 private String password;

 @ManagedProperty(value = "#{authenticationService}")
 private AuthenticationService authenticationService; // injected Spring defined service for bikes


 public String login() {

  boolean success = authenticationService.login(login, password);
  
  if (success){
   return "bikesShop.xhtml"; // return to application but being logged now 
  }
  else{
   FacesContext.getCurrentInstance().addMessage(null, new FacesMessage("Login or password incorrect."));   
   return "login.xhtml";
  }
 }
 ...
}
When login was successful and user is authenticated, he is moved to the shop. If not a proper message is displayed and user can re-enter his credentials or go back to the shop without login. Let's look inside AuthenticationService.java class which is a service deciding if user is authenticated or not.

Step 3. AuthenticationService implementation:
package com.jsfsample.application.impl;
...
@Service("authenticationService")
public class AuthenticationServiceImpl implements com.jsfsample.application.AuthenticationService {


 @Resource(name = "authenticationManager")
 private AuthenticationManager authenticationManager; // specific for Spring Security

 @Override
 public boolean login(String username, String password) {
  try {
   Authentication authenticate = authenticationManager
     .authenticate(new UsernamePasswordAuthenticationToken(
       username, password));
   if (authenticate.isAuthenticated()) {
    SecurityContextHolder.getContext().setAuthentication(
      authenticate);    
    return true;
   }
  } catch (AuthenticationException e) {   
  }
  return false;
 }
 ...
}
This Spring managed service uses internally a class AuthenticationManager, which comes from Spring Security and was defined as a manager in applicationContext.xml file:
...
 <!-- 
 manager responsible for loading user account with assigned roles 
 -->
 <sec:authentication-manager alias="authenticationManager">
  <sec:authentication-provider
   user-service-ref="userDetailsService" />
 </sec:authentication-manager>
 ...
Note that we do not explicit define AuthenticationManager! It is a ready to use object. But AuthenticationManager has helper service named userDetailService defined in applicationContext.xml file - this service must be written by our own.

Step 4. Implementation of userDetailService
userDetailsService source code is shown below:
package com.jsfsample.application.impl;
...
@Service("userDetailsService")
public class UserDetailsServiceImpl implements UserDetailsService {

 private HashMap users = new HashMap();
 
 @Override
 public UserDetails loadUserByUsername(String username)
   throws UsernameNotFoundException{
  
  org.springframework.security.core.userdetails.User user = users.get(username);
  
  if (user == null) {
   throw new UsernameNotFoundException("UserAccount for name \""
     + username + "\" not found.");
  }
  
  return user;
 }

 @PostConstruct
 public void init() {
  
  // sample roles  
  Collection adminAuthorities = new ArrayList();
  adminAuthorities.add(new GrantedAuthorityImpl("ROLE_ADMIN"));
  
  Collection userAuthorities = new ArrayList();
  userAuthorities.add(new GrantedAuthorityImpl("ROLE_REGISTERED"));
  
  boolean enabled = true;
  boolean accountNonExpired = true;
  boolean credentialsNonExpired = true;
  boolean accountNonLocked = true;
  
  // sample users with roles set
  users.put("admin", new org.springframework.security.core.userdetails.User("admin", "admin", enabled, accountNonExpired,
    credentialsNonExpired, accountNonLocked, adminAuthorities));
  
  users.put("user", new org.springframework.security.core.userdetails.User("user", "user", enabled, accountNonExpired,
    credentialsNonExpired, accountNonLocked, userAuthorities));
 }
}
We have here a Spring Security specific objects representing users and roles. In the init() method I created some mocked data two roles representing page administrators and registered users - ROLE_ADMIN and ROLE_REGISTERED. For each role I created a single account: admin (password: admin) for the ROLE_ADMIN and user (password: user) for the ROLE_REGISTERED. That's all - it is time to protect applicartion.

Step 5. Protecting application.
5 a) Scenario 1: protecting business logic. We have to protect invoking a method which allows to see bike details. This method is placed inside BikeDataProvider.java service class. In order to protect the method we have to add an annotation defining roles allowed to execute this method:
package com.jsfsample.services;
...
public interface BikeDataProvider {
 ...
 
 @RolesAllowed({"ROLE_ADMIN","ROLE_REGISTERED"}) 
 public abstract Bike getBikeById(Integer id);
 
 public abstract void add(Bike newBike);
}
This simply means that only registered users or admin users can see bike details. 
Why we do not protect the add(...) method? Because we protect the whole page access where this method is executed - of course in addition we can also protect this method by annotating it with @RolesAllowed({"ROLE_ADMIN"}).
5 b) Scenario 2: protecting resource. According to rules of protecting resources defined in applicationContext.xml, we protect all resources which are located inside /admin directory. So we have to create a directory /admin under /WebContent directory and move addBike.xhtml page there. It should look like this:


Note: there is a little trick in the protecting resources like pages in JSF. Spring Security tries to match exact URL address to apply the rule. But in JSF there is a "old URL" issue - after navigtation from page A to page B, URL address in browser still points to page A. In order to make the rule working we have to force the browser to show the current URL instead of old one. It is done by adding a special command into the navigation string returning a page for adding a bike:
public String showForm(){  
 ...  
 return "/admin/addBike.xhtml?faces-redirect=true";
}


That's all about Spring Security in our sample application. 
How to test it? After deploying application on the server and starting the server, we have to open a browser and type in URL:

http://localhost:8080/JSF2FeaturesSpring

Then try to display some bike details. When promped for login, enter credentials: user, user and try again. Then try to add a new bike - You should see access denied page. The close the application and clean the browser cache and try the same with the user admin, admin.

-------------------------------------------
Download source files:

Note: make sure that Java, Eclipse and Tomcat are properly installed and configured for running the project (additional configuration may be required if different directories are used).

Eclipse complete sample project is here (with all required libraries). The sample project is a ready to run application which contains all described Spring Security issues in this post. You can also download a war file located here (just copy it inside webapps folder in Your Tomcat and start Tomcat with the script startup.bat)

Tuesday, December 14, 2010

JSF 2 with Spring 3 - basics (part 1 of 2)

Note: below description uses Eclipse Indigo, Tomcat 7.0.28, MyFaces 2.1.7, Spring Framework 3.1.1, Spring Security 3.1.0.

Requirements:
  • a working example from the last article of a serie introducing new JSF 2.0 features.
You will learn:
  • how to integrate Spring Framework into JSF 2.0 application
In the previous three posts I described some interesting JSF 2.0 features and I put them together in the sample application. Those parts were mostly focused on web content, a GUI and its behaviour.
What about the server side? What about the business logic executed underneath? Do we had a business logic in the sample application mentioned above? Of course we had. Presenting bikes list or a certain bike under some condition -  this is business logic resposniblity. Filtering bikes and presenting only those with the discount - this is also business logic. Don't think of it as a naive filtering of presented data - the business logic decides what does it mean that the certain bike has discount - it can be lower price but it can be also more complicated. In the previous example we had a class named BikeDataProvider.java which represented business logic. It was a singleton invoked with the help of static method getInstance() anywhere where needed.
When the application starts to grow up, we have more business logic accomplishing some business cases. We need something that will help us to manage the whole business logic in an elegant way - this is where Spring comes to play.
We will change the BikeDataProvider class into object created and managed by Spring. This object will be called service. A service which serves business logic. Then the service will be used by JSF managed beans. Let's add Spring to our sample web apllication. 

Step 1: adding required Spring libraries into the project. 


Step 2: creating Spring's configuration file named applicationContext.xml. The file has to be located inside /WEB-INF directory. This is full content of that file:
<?xml version="1.0" encoding="UTF-8"?>
<beans xmlns="http://www.springframework.org/schema/beans"
 xmlns:context="http://www.springframework.org/schema/context"
 xmlns:xsi="http://www.w3.org/2001/XMLSchema-instance" xmlns:aop="http://www.springframework.org/schema/aop"
 xmlns:faces="http://www.springframework.org/schema/faces"
 xmlns:int-security="http://www.springframework.org/schema/integration/security"
 xmlns:tx="http://www.springframework.org/schema/tx" xmlns:sec="http://www.springframework.org/schema/security"
 xsi:schemaLocation="http://www.springframework.org/schema/integration/security http://www.springframework.org/schema/integration/security/spring-integration-security-3.1.xsd
  http://www.springframework.org/schema/aop http://www.springframework.org/schema/aop/spring-aop-3.1.xsd
  http://www.springframework.org/schema/security http://www.springframework.org/schema/security/spring-security-3.1.xsd
  http://www.springframework.org/schema/integration http://www.springframework.org/schema/integration/spring-integration.xsd
  http://www.springframework.org/schema/beans http://www.springframework.org/schema/beans/spring-beans-3.1.xsd
  http://www.springframework.org/schema/faces http://www.springframework.org/schema/faces/spring-faces-3.1.xsd
  http://www.springframework.org/schema/tx http://www.springframework.org/schema/tx/spring-tx-3.1.xsd
  http://www.springframework.org/schema/context http://www.springframework.org/schema/context/spring-context.xsd">

 <context:component-scan base-package="com.jsfsample" />

</beans>

Step 3: modifying web.xml by registering listener resposnible for loading Spring in web application.
<listener>
  <listener-class>org.springframework.web.context.ContextLoaderListener</listener-class>
 </listener>
 <context-param>
  <param-name>contextConfigLocation</param-name>
  <param-value>/WEB-INF/applicationContext.xml</param-value>
 </context-param>
Step 4: modifying faces-config.xml file for allow JSF components use Spring components.
<application>
... <el-resolver>org.springframework.web.jsf.el.SpringBeanFacesELResolver</el-resolver>
...
 </application>
Step 5: modifying BikeDataProvider.java toward Spring managed service.

First of all we will add a new functionality to the application - possibility to add a new bike to the selected category. We need to create an .xhtml page with the form, then managed bean for that page and at the end a business logic method in class BikeDataProvider.java responsible for adding new bike to bikes' list. That's easy part - it will be visible in the attached complete example. 
Assuming that we have this new funcitonality, we can modify .java files for Spring integration. First we create an interface: 
package com.jsfsample.services;
//imports
public interface BikeDataProvider {

 public List<Bike> getBikesByCategory(Integer categoryId,
   boolean onlyWithDiscount);

 public Bike getBikeById(Integer id);

 public void add(Bike newBike); // new function

} 
Then we have to create an implementation named BikeDataProviderImpl.java (yes, I know that this naming convention is bad) which will have the source code from previous BikeDataProvider.java class. This implementation will have Spring specific annotation defining the service:
package com.jsfsample.services.impl;
//imports
@Service("bikeDataProvider")
public class BikeDataProviderImpl implements BikeDataProvider {

 private List<Bike> bikes;
 private Integer currentBikeId;
 
 @PostConstruct
 private void prepareData(){
  bikes = new ArrayList<Bike>();
  
  // MTB
  Bike mtb1 = new Bike();
  mtb1.setId(1);
  mtb1.setName("Kellys Mobster");
  mtb1.setDescription("Kellys Mobster, lorem ipsut...");
  mtb1.setPrice(6500);
  mtb1.setCategory(1); 
  bikes.add(mtb1);
  // other bikes are mocked up the same way
  
 }
 
 public List<Bike> getBikesByCategory(Integer categoryId, boolean onlyWithDiscount) {
  // implementation 
 }
 public Bike getBikeById(Integer id){
  // implementation 
 }

 public void add(Bike newBike) {
  bikes.add(newBike);
 }
} 
The annotation @Service("bikeDataProvider") means that this is Spring managed object (created by Spring) and is visible in the Spring context under the name "bikeDataProvider". @PostConstruct is a little trick here - when object of this class is instantiated by Spring, the method is invoked right after the object is created. I used this for preparing demo data of bikes. The whole BikeDataProviderImpl.java class acts as a simple data source for the application - in the future we will use a real database instead.

Step 6: modifying JSF managed beans to use Spring service inside.

We will use registered Spring service inside JSF managed-beans. For example consider BikeDetails.java managed bean. Previously we loaded certain bike in this way:
package com.jsfsample.managedbeans;
// imports
@ManagedBean(name="bikeDetails")
@RequestScoped
public class BikeDetails {

 private Integer bikeId;
 private Bike bike; 
 
 public void loadBike(){
  bike = BikeDataProvider.getInstance().getBikeById(bikeId);
 }
        ...
}
Now BikeDataProvider.java is not a singleton - it is a Spring service. BikeDetails.java managed bean is changed:
package com.jsfsample.managedbeans;
// imports
@ManagedBean(name="bikeDetails")
@RequestScoped
public class BikeDetails {

 private Integer bikeId;
 private Bike bike; 
 
 @ManagedProperty("#{bikeDataProvider}")
 private BikeDataProvider bikeDataProvider; // injected Spring service

 public void loadBike(){
  bike = bikeDataProvider.getBikeById(bikeId);
 }
        ...
}
We used the name of registered service ("bikeDataProvider") to inject it into JSF managed bean (please note that we used here an interface as an instance variable, Spring injects its concrete implementation). This injection is possible thanks to modifications from step 4.


That's all. Other JSF managed beans responsible for displaying bikes' lists or adding a bike use mentioned Spring service in the same way.

-------------------------------------------
Download source files:
The complete working example of mentioned application which will contain all described issues, will be available in the last (second) article of this serie.


Thursday, October 21, 2010

JSF 2.0 - New features (part 3 of 3)

Note: below description uses Eclipse Indigo, Tomcat 7.0.28 and MyFaces 2.1.7. 

Requirements:
You will learn:
  • support for Ajax
  • support for GET and creating bookmarkable URLs

This is the third post about new features that could be found in JSF 2.0 comparing to JSF 1.x. In the previous post (part 1), I described templating mechanism and simplified navigation model. In the second post (part 2), I described resource loading mechanism. In this post I would like to focus on the built in Ajax support and on possibility to create bookmarkable URLs.

Ajax support.
Ajax is a very wide issue. I would like to show only one of the simplest example - refreshing part of the page after some action. The purpose of this example is to show that using simple Ajax does not require any additional configuration or libraries.
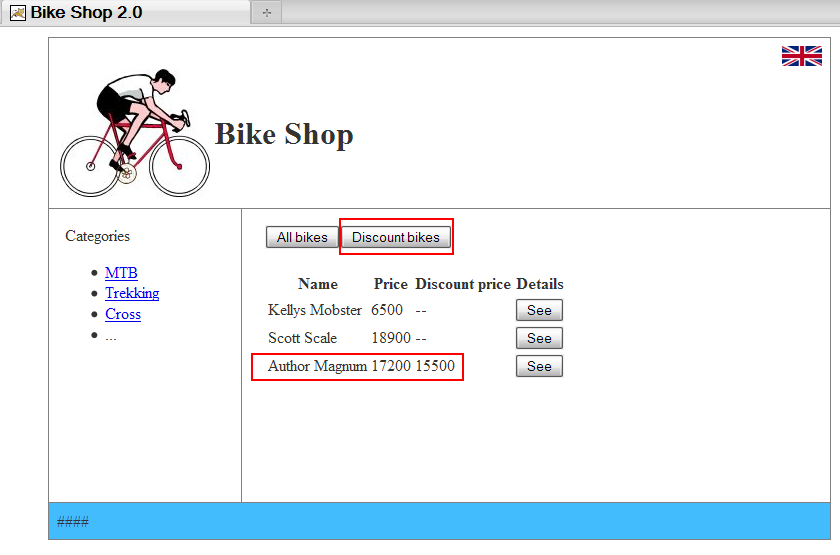
In the sample application I have a page bikesList.xhtml. This page shows the bikes list in selected category (category is chosen in main menu on left). Some of the bikes have discount price. I have two buttons (above the displayed bikes list) acting as bike list filters. Pressing those buttons causes filtering the list and reloading it on the view. For example: if I press a button "Discount bikes" (in red box), only one bike will be shown on a list (Magnum bike with doscount price, marked by red box). If I press "All bikes" - all bikes from the category will be shown:


The idea is to reload the bike list after pressing the button, without reloading the whole page. This is done by Ajax call which is "hooked" to the buttons:
<ui:define name="content">
        <h:commandButton actionListener="#{bikesListBean.showAllBikes}" value="#{msg['bikes.filter.all']}">
            <f:ajax render="bikesTable"  />
          </h:commandButton>
              
          <h:commandButton actionListener="#{bikesListBean.showDiscountBikes}" value="#{msg['bikes.filter.discount']}">
            <f:ajax render="bikesTable"  />
          </h:commandButton>
           
        <h:dataTable id="bikesTable" value="#{bikesListBean.bikesList}" var="b">
...
</ui:define>
Ajax call defined by <f:ajax render="bikesTable" /> causes reloading the corresponding part of thw page with id=bikesTable. In our case this is the list  <h:dataTable id="bikesTable" ... > which shows all or filtered bikes. Simple - isn't it?

Creating bookmarkable URLs (GET support).
Why do I need GET? Consider this situation: I found interesting bike in the Bike Shop. I would like to get the URL and send it to someone in order to show what I found. Quite normal thing isn't it? Unfortunately not possible in JSF 1.x because of lack of GET support. JSF 1.x is POST-centric, so passing parameters in the URL wiht GET was not possible - so I have no way to save the URL.
JSF 2.0 provided GET support by introducing so-called "view parameters". A page which uses a special component for view parameters, is able to catch incoming view parameters (they are in the URL) and update page model (i.e. fields in managed bean) with their values. Moreover standard conversion and validation of the incoming parameters is possible - just like for the POST data.

How it work in real example? Let's go back to our sample application. We have a page named bikesList.xhtml which shows all bikes. We also have a page named bikeDetails.xhtml which shows the detail of selected bike. I would like to see the particular bike and take the URL with it and send it to someone. So the bikeDetails.xhtml page will contain view parameter component:
<f:metadata>
  <f:viewParam name="bikeId" value="#{bikeDetails.bikeId}"/>
  <f:event type="preRenderView" listener="#{bikeDetails.loadBike}"/>
</f:metadata>
Page expects the URL parameter named bikeId, then value of this parameter is copied into the model to the field #{bikeDetails.bikeId}. For now skip <f:event .../> component - I will back to it at the end.
Where those parameters are created and passed to the URL? JSF 2.0 provides two components allowing to add GET parameters to the target URL: <h:button /> and <h:link />(they work similar to the POST-centric <h:commandButton /> and <h:commandLink). In our example bikesList.xhtml page uses <h:button /> for each presented bike to construct the button which navigates us to bikeDetails.xhtml and sets bikeId as a parameter:
<h:dataTable id="bikesTable" value="#{bikesListBean.bikesList}" var="b">
...
<h:button outcome="bikeDetails" value="#{msg['bikes.list.seebike']}">
  <f:param name="bikeId" value="#{b.id}"/>
</h:button>
...
</h:dataTable>
Notice outcome attribute and its value - it points to the target page where view parameters component is used. Simplified navigation is used here. Generated URL looks like this:

http://localhost:8080/JSF2Features/faces/bikeDetails.xhtml?bikeId=5

We have bokkmarkable URL which can be saved and sent to other people and used later.

Solution with view parameters on bikeDetails.xhtml uses another new feature in JSF 2.0: system events. We register a special listener using the tag
<f:event type="preRenderView" listener="#{bikeDetails.loadBike}"/>

The listener is executed before the view is rendered. What is the benefit? When a view is reached, view parameter is copied into the managed bean and listener is executed and after that the whole view (page) is rendered. Our listener uses passed bikeId to load the selected bike from repository like database. When the page is rendered, the proper bike is loaded from repository and ready to be displayed - we do not have to wait for loading the data.

That's all. We are ready to test the application. After deploying application on the server and starting the server, we have to open a browser and type in URL:

http://localhost:8080/JSF2Features


-------------------------------------------
Download source files:

Note: make sure that Java, Eclipse and Tomcat are properly installed and configured for running the project (additional configuration may be required if different directories are used).

Eclipse complete sample project is here (with all required libraries). The sample project is a ready to run application which contains all described JSF 2.0 features in first, second and this (third) post. You can also download a war file located here (just copy it inside webapps folder in Your Tomcat and start Tomcat with the script startup.bat)

Wednesday, October 20, 2010

JSF 2.0 - New features (part 2 of 3)

Note: below description uses Eclipse Indigo, Tomcat 7.0.28 and MyFaces 2.1.7. 

Requirements:
You will learn:
  • resource loading
This is the second post about new features that could be found in JSF 2.0 comparing to JSF 1.x. In the previous post (part 1), I described templating mechanism and simplified navigation model. In this post I would like to focus on the improved resource loading and its capabilities in JSF 2.0.

Resource loading.
What are resources in terms of a web application? It can be images files, JavaScript script files or CSS files used on web pages in the application - so some external files accessible by special tags in the page source. In the JSF application we also name as resources message bundle files.
Just as a short reminder for message bundles:
1. We create message bundle files for each language we would like to support. Then we add some lines into the configuration in faces-config.xml where we define what language will be supported (<locale-config> section) and we define EL access object (<var>msg</var>) for the created message bundle files:


2.  We use message from the bundle files by calling defined EL accessor in the page source, for example:
<h:outputText value="#{msg['top.name']}" />
This approach gives us the most important benefit: localization of the application. Based on the browser's language, suitable message bundle file is used (EN or PL in above example).

So far so good - nothing new is here when comparing to JSF 1.x. But what about other resources like JS, CSS or image files? JSF 2.0 can handle those resources in a more intelligent way than before - a special ResourceHandler is used for load resources from some predefined locations. According to the documentation resources are expected to be placed in:

WebRoot/resources/<resourceIdentifier> 

WebRoot is a root of web application - in the Eclipse generated web projects it is the directory named "WebContent". Part resourceIdentifier have this structure:

[localePrefix/][libraryName/][libraryVersion/]resourceName[/resourceVersion] 

resourceIdentifier defines the subdirectory structure inside WebRoot/resources/directory. And the most important part: localePrefix means that resources can be localized based on the browser's language, like message bundles. Part libraryName can be use to group resources by their type in different directories, for example "css", "images", "scripts".

Let' see how it work in a sample application. As I wrote in previous post, we used shopTemplate.xhtml file as a template page for all pages in application. The second purpose of this file (next to defining reusable parts) is to separate the structure from the presentation - template page will include all CSS files and common images files. We will use new ResourceHandler in order to load some CSS and images suitable for current browser language:
  • images: we have two pictures (bike_logo.jpg and flag.gif) in sample application visible in the header - they will change depending on current browser language
  • CSS: depending on current browser language, different CSS will be loaded. The only difference between loaded CSS's is footer color (just to show that CSS is really changed)
According to the documentation we have to create directory structure for mentioned resources and put different resource there:


How to load such resources on the page? First we have to perform additional configuration to enable loading resources using proper localePrefix ("pl" and "en" on the screenshot above). We have to create a special localized entry named javax.faces.resource.localePrefix in a resource-bundle file. This file must be configured as message-bundle in faces-config.xml - we can not use resource bundles (used for localized messages as shown above) to put entry there:


Now we can use the resources on the shopTemplate.xhtml page:


Please note that we use here a new JSF 2.0 tag:
<h:outputStylesheet library="css" name="layout.css" />
Attributes library and name correspond to the libraryName and resourceName from <resourceIdentifier> respectively.

If we want to load  JS scripts we have to use additional JSF 2.0 tag: <h:outputScript ... /> wich has additional attribute named target - specifying where to render script link.

Loading images with standard tag <h:graphicImage ... /> is possible in two ways:
  • using attributes library and name correspond to the libraryName and resourceName from <resourceIdentifier> respectively (like for CSS)
  • using special EL expression "#{resource['images:bike_logo.jpg']}" (wartch out for letters: EL has resource word but in the WebContent there is a resources directory!)

Note about testing: in order to test if images and CSS (footer color) changes when browser language is changed, I recommend clean the browser cache and restart it completely before testing (sometimes image cache prevents from changing the image). The test result should be:

PL version:


EN version:


-------------------------------------------
Download source files:
The complete working example of mentioned application which will contain all described features, will be available in the last (third) article of this serie.

Sunday, October 17, 2010

JSF 2.0 - New features (part 1 of 3)

Note: below description uses Eclipse Indigo, Tomcat 7.0.28 and MyFaces 2.1.7. 

Requirements:
  • working "Hello World" example in JSF 2.0 as a basis (from here)
You will learn:
  • templating with Facelets
  • simplified page navigation
In the previous post I showed how to create classic "Hello World" application in JSF 2.0. The example was created in the simplest possible way. I focused on generating and setting up working and ready to use project in Eclipse. Created application did not differ much from similar "Hello World" applications in JSF 1.2, because I did not use JSF 2.0 built-in featues. Now it is a time to show what new features are in JSF 2.0 and how they can improve development web applications. 

Sample application:
In order to go higher than "Hello World" level we will create fully functional mini application which will serve as an example for mentioned JSF 2.0 features.
Let's assume that we are creating a web application for bicycle shop. Our application should present a list of available bikes. Bikes will be divided because of their type like MTB, Trekking and Cross bikes. In addition bike list will have a filter allowing to display only bikes with a special discount price. User should be able to display detailed information about selected bike from the presented list. We will use those pages in application:
  • bikesShop.xhtml - start page presenting information about bike shop
  • bikesList.xhtml - page presenting bikes of given type
  • bikeDetails.xhtml - page presenting detailed information about bike displayed on bikesList.xhtml
Under the hood we will use those classes:
  • BikeDataProvider.java - singleton, acts as service which belongs to business logic. Responsible for loading bikes of certain type and loading single bike with its details. For simplicity all bikes instances are created and stored inside that class.
  • Bike.java - a class from the model representing single bike instance. A list of bike instances is created and used inside BikeDataProvider.java.
  • BikeDetails.java, BikesList.java - managed beans used for bikeDetails.xhtml and bikesList.xhtml respectively. They call BikeDataProvider.java for loading bikes list or single bike.

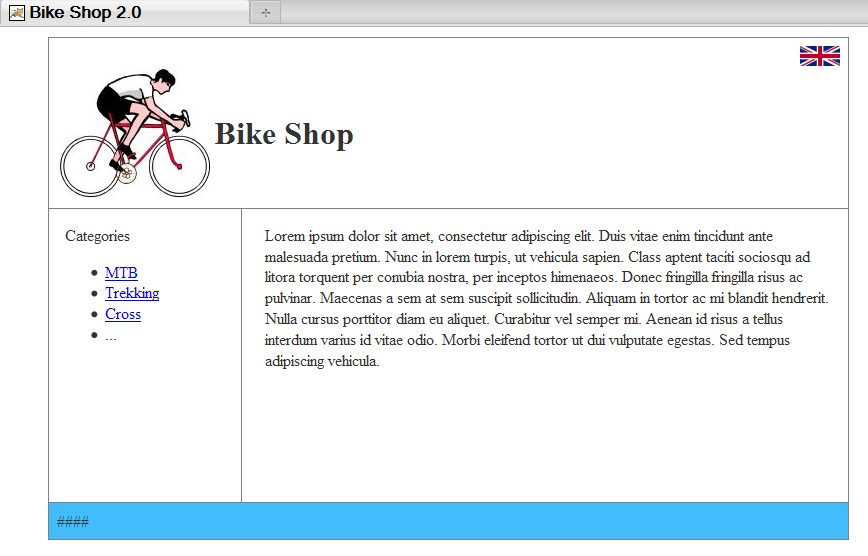
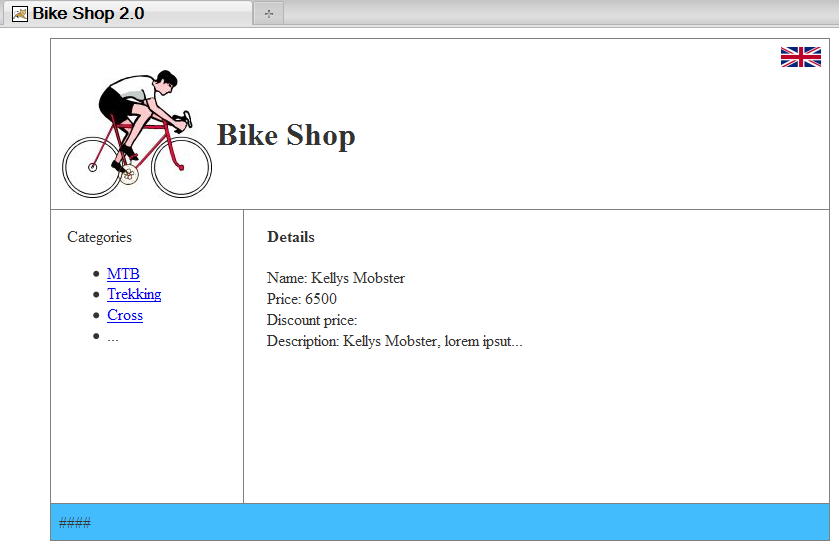
Web application will have popular and standard layout - header on top, menu on left, content on righ, footer on bottom. Header will have shop's logo and name, menu will have bike types listed, content will have some information about the shop and will display bikes list for given type, footer will be empty with some background color. The whole application will look like this:

bikesShop.xhtml:


bikesList.xhtml:


bikesDetails.xhtml:


Facelets - templating.
One of the key feature of Facelets is ability to create page templates. Have a look at our sample applications screenshot above - all of them have common content like header, left menu and footer. If we had JSF application based on JSP pages without using Facelets, those elements would be included separately into source code of each web page. Imagine small change in the header - it may become a maintenance nightmare because we have to change source code of all pages where header is visible. With the Facelets is it possible to extract common content and put it into one page template. The template has special sections where variable content will be displayed - pages which use the template "injects" to those sections their specific content.

For our application we will create a template page named shopTemplate.xhtml which will act as a template for three pages visible above (bikesShop.xhtml, bikesList.xhtml, bikeDetails.xhtml). The whole page layout common for all pages will be defined inside the single template page. This gives us another advantage - we can follow one of the best practises in designing web pages here - separate the structure from the presentation. The template will contain only the pages structure while the whole presentation will be placed in separate CSS file used by template. The source code for the template will look like this:
<?xml version='1.0' encoding='UTF-8' ?> 
<!DOCTYPE html PUBLIC "-//W3C//DTD XHTML 1.0 Transitional//EN" "http://www.w3.org/TR/xhtml1/DTD/xhtml1-transitional.dtd">
<html xmlns="http://www.w3.org/1999/xhtml"
      xmlns:ui="http://java.sun.com/jsf/facelets"
      xmlns:h="http://java.sun.com/jsf/html"
      xmlns:f="http://java.sun.com/jsf/core">
    
    <h:head>
        <meta http-equiv="Content-Type" content="text/html; charset=UTF-8" />
        <title>Bike Shop 2.0</title>
    </h:head>
    
    <h:body>
        <div id="container">
            <div id="top">
                <!-- logo and name goes here -->
            </div>
            <div id="leftnav">
                <h:form>
                    <!-- links goes here -->
                </h:form>
            </div>
            <div id="content">
                <ui:insert name="content" />
            </div>
            <div id="footer">
                ####
            </div>
        </div>
     </h:body>   
</html>

Please note the element <ui:insert name="content" /> inside the div named "content". It represents variable content which will be displayed in this place. Pages bikesShop.xhtml, bikesList.xhtml and bikeDetails.xhtml will "inject" here their content using special syntax. Let's have a look how bikesShop.xhtml page display its content using the template. Here is the code for bikesShop.xhtml:
<?xml version='1.0' encoding='UTF-8' ?>
<!DOCTYPE html PUBLIC "-//W3C//DTD XHTML 1.0 Transitional//EN" "http://www.w3.org/TR/xhtml1/DTD/xhtml1-transitional.dtd">
<html xmlns="http://www.w3.org/1999/xhtml"
      xmlns:ui="http://java.sun.com/jsf/facelets"
      xmlns:h="http://java.sun.com/jsf/html"
      xmlns:f="http://java.sun.com/jsf/core">
  <ui:composition template="shopTemplate.xhtml">
       
        <ui:define name="content">
         Lorem ipsum dolor sit amet...
        </ui:define>

  </ui:composition>
</html>

First note that bikesShop.xhtml page have no <head> or <body> tags - they are defined in the template. A special element <ui:composition template="shopTemplate.xhtml"> tells the page to use the mentioned template.
As I wrote, the template has a special section for inserting the variable content (<ui:insert name="content" />). The page bikesShop.xhtml defines content to be placed into that section by using the tag <ui:define name="content"> ... </ui:define>  - note that attribute name="content" is the same for  <ui:insert/> and <ui:define />. Pages bikesList.xhtml and bikeDetails.xhtml use the same mechanism (they have the same <ui:define /> tag in their source).
That's all about templates.

Simplified page navigation.
Every page navigation in JSF 1.x required a proper entry in faces-config.xml file. It was something like this:

<navigation-rule>
     <description>Welcome page to message page</description>
     <from-view-id>/index.jsp</from-view-id>
     <navigation-case>
       <from-outcome>helloMessage</from-outcome>
       <to-view-id>/message.jsp</to-view-id>
    </navigation-case>
   </navigation-rule>

JSF 2.0 provides a simplified navigation model - we do not need any entries (navigation rules) in the faces-config.xml file. Why?
Suppose we have a method used for navigation which returns some string value. This string value (known as outcome) is taken by a navigation handler and the handler checks for navigation rules in faces-config.xml which have defined the same from-outcome value. When the rule is found, it is applied and a proper navigation is done. This is how it worked in JSF 1.x and how it works in JSF 2.0. But JSF 2.0 navigation handler does additional operation here: if no matching from-outcome value is found in faces-config.xml (in other words: there is no navigation rule to apply), handler checks also existing pages names (view identifiers). If existing page name matches returned outcome value, the navigation is done to that page.
For example if we have a navigation method in some backing bean:
public String getBikes(){
   bikesList = ... // load some bikes
   return "bikesList";
}
and there is a page named bikesList.xhtml, invoking this method will cause the navigation to that page - without defining proper navigation rule in faces-config.xml.

-------------------------------------------
Download source files:

The complete working example of mentioned application which will contain all described features, will be available in the last (third) article of this serie.